
Looking out for a jumping spider going into moult can become an obsession, especially for a first-time owner. You might notice them sleeping more or behaving wrong, and wonder if you should offer food. Even for veteran keepers like me, with professional experience, I constantly wonder if they are okay and when they will emerge. Watching, observing, and checking their behavior and activity closely helps reduce anxiety and ensures your pet is safe and stress-free. Providing attentive care during Jumping Spider Moulting is essential, as it is a delicate and critical phase in their life.

There comes a time in every spider’s life when their body feels tight after enjoying tasty crickets and filling themselves. This is when they begin shedding their old clothes their exoskeleton through the fascinating process called ecdysis. The moulting can take just a few minutes for a baby jumping spider or up to weeks for a sub adult. Each stage, phase, and cycle of Jumping Spider Moulting allows growth, development, and transformation, increasing their size, and refreshing their skin. Keeping them in a safe, stress-free environment during this molting period ensures successful juvenile progression and a healthy molted spider.
What is Jumping Spider Moulting?
Spiders must shed their exoskeleton in order to grow larger, and this fascinating process is known as Jumping Spider Moulting. Different jumping spiders go through varying amounts of moults depending on their species, such as regal jumping spiders. Before they mature, males may have fewer moults while females can have more. Each moult is marked by instars, starting with the 1st instar after they hatch, then progressing to the 2nd instar, 3rd instar, and so on as they move through each stage of growth.
Regal jumping spiders will naturally moult every few weeks, but after the 7th instar there may be longer gaps between moults. Factors like travel, being posted, or overfeeding can sometimes trigger a moult earlier. The stages include Pre-moult, Moulting, and Post-moult, forming a complete phase and cycle of development and transformation. During this process, the juvenile spiders increase in size, body changes occur, and growth and progression continue safely, guided by careful observation and attentive care during Jumping Spider Moulting.
Pre-Moult: Jumping Spider Moulting Signs
Before Jumping Spider Moulting, you may notice your spider ignoring or retreating from dinner, sometimes acting a little skittish. A clear clue is when the spider stays in bed for multiple days in a row. You don’t need to offer food, and it’s best to remove crickets or mealworms, as a soft, freshly, moulted spider can be sensitive, though flies can remain in the enclosure. Mature spiders may hide in their webs for long periods, but they won’t moult again. Males may lay sperm onto the hammock lining to fill their pedipalps, while females prepare to lay eggs, which stay unfertilised unless paired.
During the pre-moult stage, your jumping spider may move slightly in the web, peek at you, or even come out for a drink, so it’s important to mist the enclosure every day. This stage can last 3 days to over weeks, depending on the individual. Careful observation of movement and respecting their space ensures a safe and smooth Jumping Spider Moulting process.
WARNING During Jumping Spider Moulting
If you suspect your spider is in moult, it is very important not to disturb them in their hammock. Sometimes spiders emerge without moulting, so you should wait at least 24 hours before handling or moving them. At any time, remember not to do anything that might stress your spider, and please give them space to safely complete Jumping Spider Moulting.
Careful observation and patience are essential during this stage. Avoid touching or relocating your spider, and monitor their time in the hammock to ensure they emerge naturally. Following these precautions helps prevent injuries and supports a smooth Jumping Spider Moulting process while maintaining the spider’s health and safety.
Physical Moult: Jumping Spider Moulting Stage
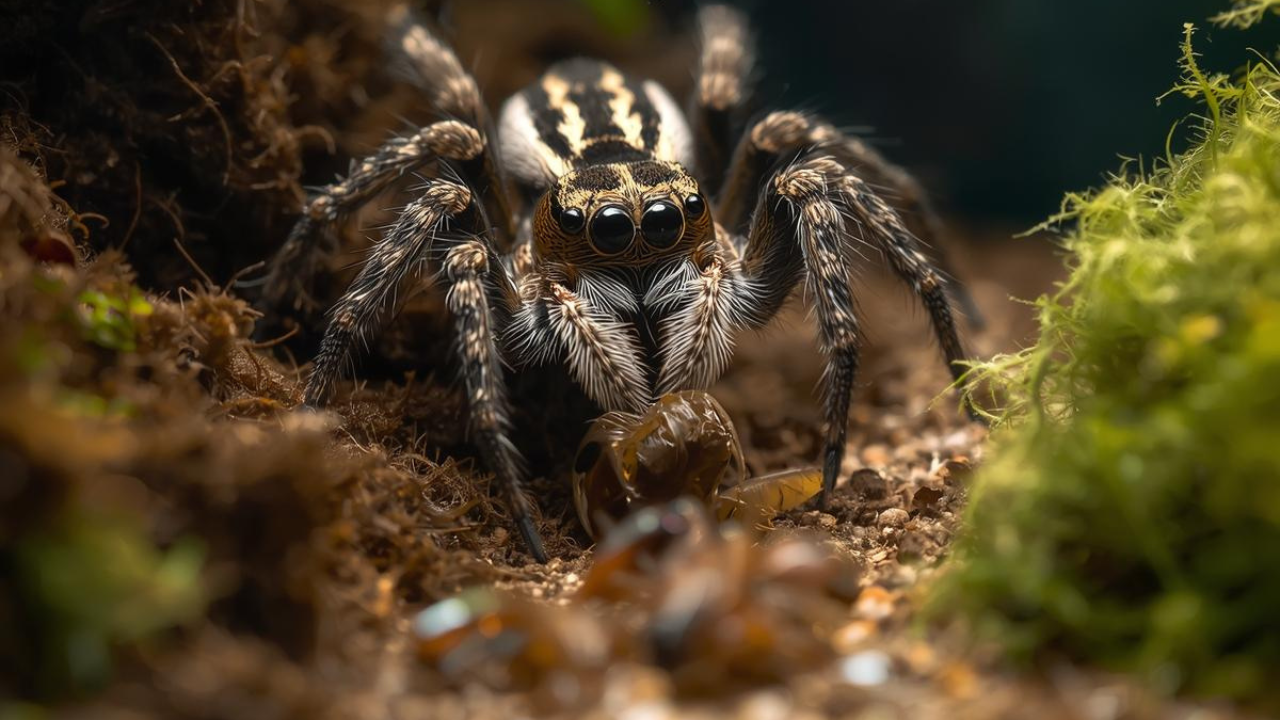
During the physical stage of Jumping Spider Moulting, your spider will move into the main moult step, which is much quicker than the pre or post phases. From my professional experience, this part often takes far less than an hour, but the timing comes down to each individual spider. You may notice their body contract tightly into what is commonly known as a death curl, which looks scary but is completely normal. Many new keepers feel alarmed, but this contraction is entirely part of the natural process.
As the moult continues, the spider will eventually relax and uncurl after a few hours. During this stage, it’s important not to disturb them, as they are extremely fragile while exiting the old exoskeleton. Staying patient and observing from a distance ensures their safety and allows this delicate moment in their growth to pass smoothly.
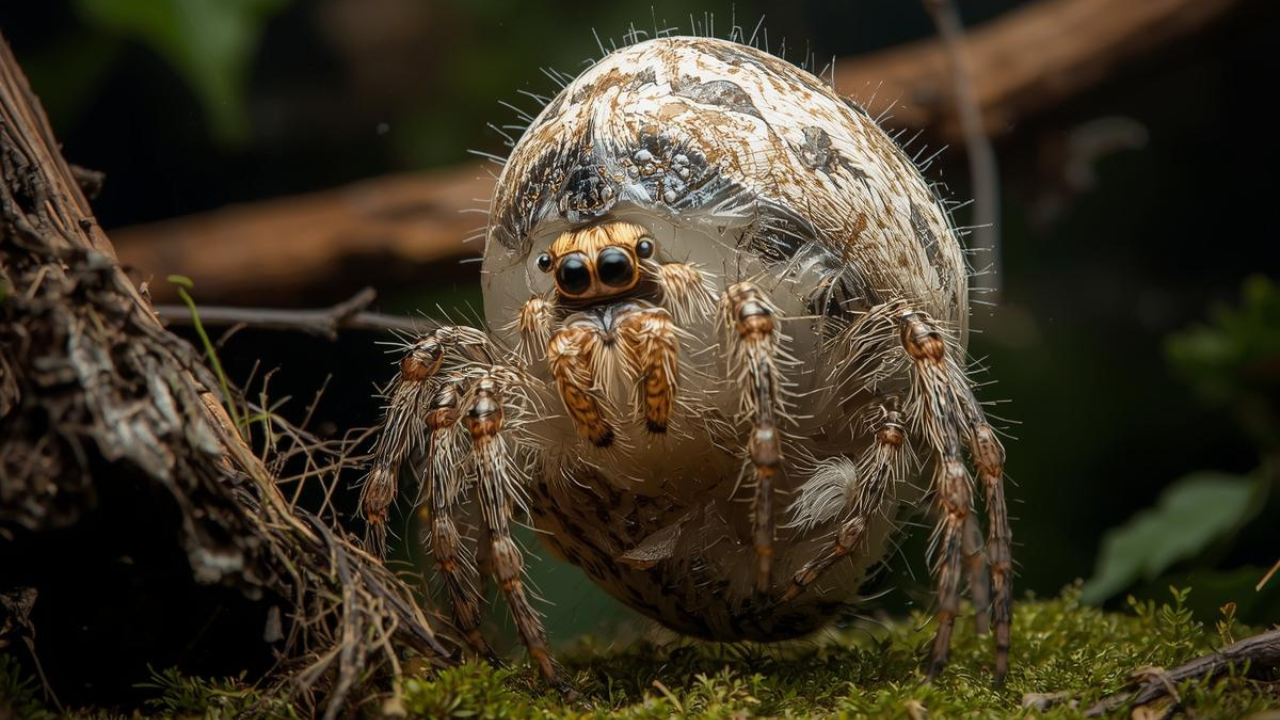
Post-Moult: Jumping Spider Moulting Care
As a specialist with real hands-on experience, I always tell keepers that the period after a moult is a sensitive time for your jumping spider. For a few days or even a week, the spider’s body needs to harden, especially because it cannot eat when the mouthparts are still soft and can be easily damaged by trying to chew. During this phase, please refrain from disturbing the enclosure and simply mist regularly to keep humidity stable. Just hold off on offering food until the little spider feels safe and has hardened fully. Once it starts to stroll around confidently and show its new look, you can offer its first meal again as part of proper Jumping Spider Moulting care.
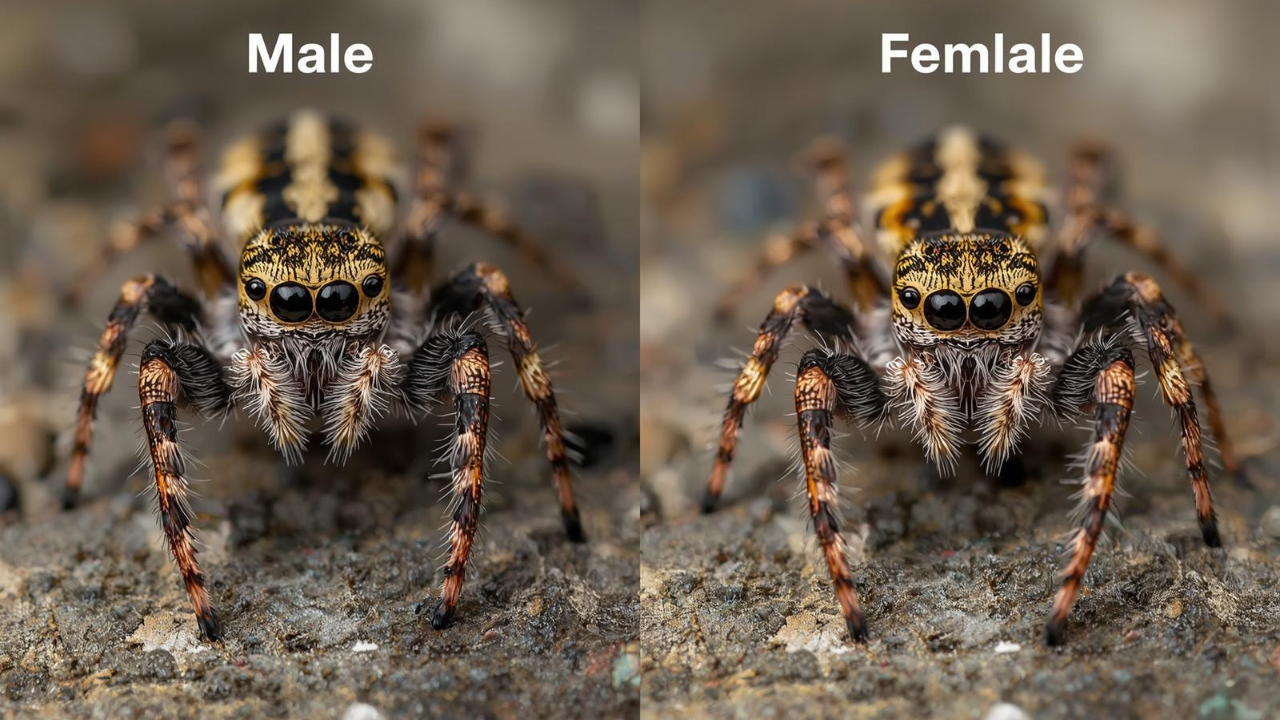
Many keepers notice that regal jumping spiders completely change their colours after moulting, shifting from dark, light, cream, or fluff tones to richer grey, raven, or black shades. For some, this little time passes with subtle differences they don’t seem to change much at all. Mostly, it’s the males that show that beautiful blue-shine, while the female often appears hardly changed. This can surprise new keepers, but there is no need to worry every moult brings its own unique shift, and observing these changes is always worth the wait.
New Shiny Exoskeleton: Jumping Spider Moulting Results
After Jumping Spider Moulting, your spider takes time to adjust before fully returning to the world. Once it feels ready, it will open its web sack, go out, and look for needed hydration. A gentle feeder insect later helps replenishing depleting energy reserves. A young juvie simply keeps living its life as it always did, exploring the enclosure, interacting with its owner, or sitting in ambush, waiting for a juicy cricket to hop by.
After a final moult, the spider’s priorities change. Mature males become less interested in food and explore more in hopes to find a female to breed with, while a female may concentrate on building up a cosy space for growing eggs. With my professional experience, I can confirm that each spider moves at its own pace—resting, regaining strength, and stepping confidently into its new life.
FAQ
How long do jumping spiders molt for?
During Jumping Spider Moulting, the ecdysis process can take just a few minutes for a baby jumping spider, while a sub adult may need up to three weeks. Timing varies with age, health, and environment, so patience is key. Older spiders often stay hidden and use more energy, making their moulting longer, but this is completely normal.
How to tell if your jumping spider is moulting?
From my professional experience, you can often identify Jumping Spider Moulting by observing the moults left behind. The carapace may not be fully intact and could be loosely hanging, appearing more translucent than a dead spider. The legs of a recently moulted spider usually do not show the death curl position seen in a dead spider, where the legs are tucked inwards toward the underside.
Sometimes, spiders may even play dead briefly while preparing to shed. Noticing these subtle signs, including a softer, fragile exoskeleton and changes in legs position, can help you determine that your jumping spider is moulting. Regular observation allows you to provide the safest care during this sensitive
What should I do if my jumping spider is molting?
During Jumping Spider Moulting, it’s important to leave your spider undisturbed. The moults may show a carapace that is not fully intact and may be loosely hanging. Your spider might look translucent, and its legs will not be in the usual death curl position seen in a dead spider. The legs may be slightly tucked inwards toward the underside, and sometimes spiders can even play dead briefly while they prepare to shed.
Avoid touching or moving your spider during this time. Do not try to fix or adjust the carapace or legs, and keep the environment calm and safe. Observing these signs carefully will help ensure your spider completes its moulting safely and grows properly.
Conclusion
Jumping Spider Moulting is a critical and fascinating process in every spider’s life, enabling growth, healthy development, and the transformation into a larger, stronger, and more vibrant spider. Knowing the stages pre moult, physical moult, and post-moult is essential for all keepers, especially beginners, to ensure the spider stays safe, calm, and stress free throughout. Carefully observing your jumping spider allows you to spot key signs like behavioral changes, retreating, or body contractions, so you can provide the right support at each stage.
Maintaining a stable environment, avoiding unnecessary disturbances, controlling humidity, and offering food only when safe are vital for a successful moult. With patience and attentive care, you can witness the complete ecdysis process, admire the new shiny exoskeleton, and help your spider transition smoothly. Proper guidance during Jumping Spider Moulting promotes spider health and strengthens your bond as a dedicated keeper.
