Understanding the Jumping Spider Moulting Process
What Is the Jumping spider moulting process?
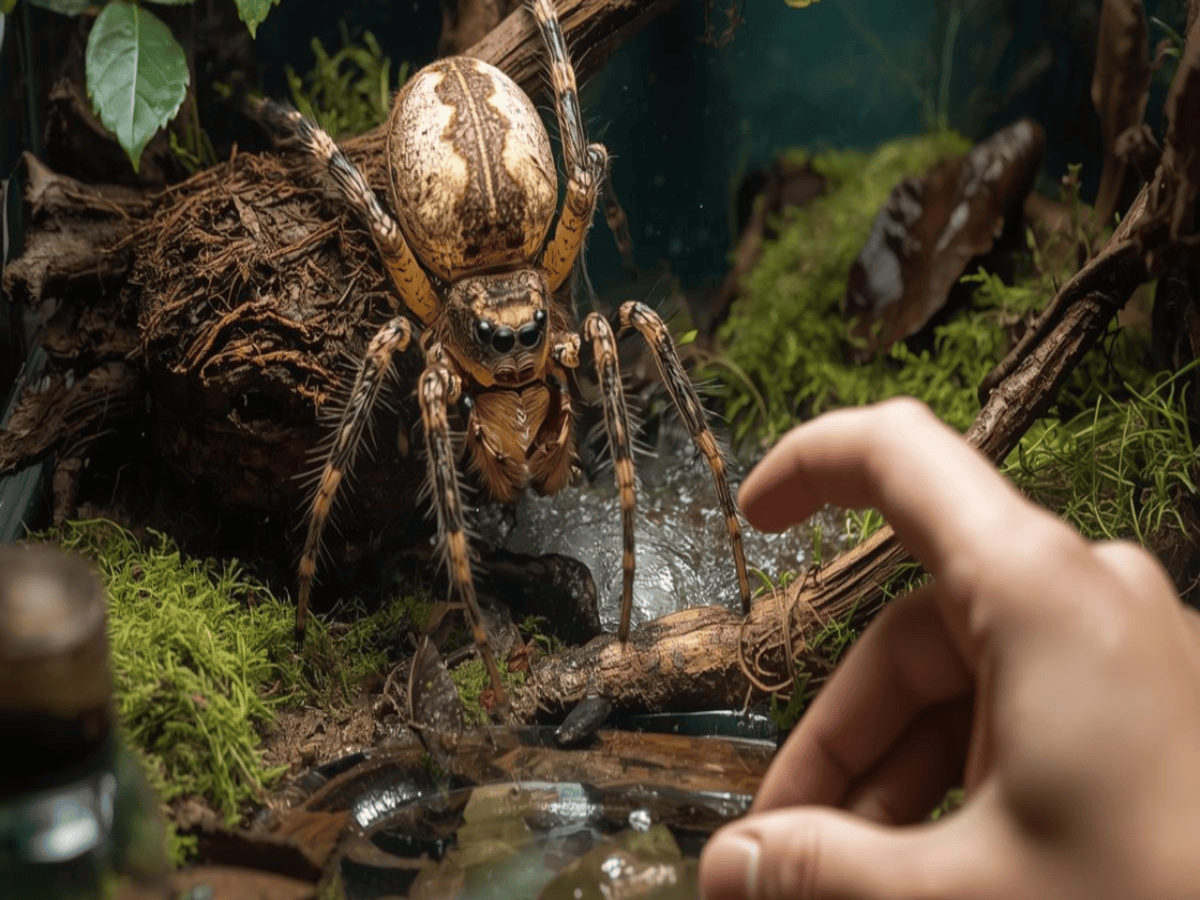
The Jumping spider moulting process is a natural biological stage where a spider sheds its old exoskeleton to grow. Unlike mammals, jumping spiders cannot stretch their outer shell. To increase in size, they must replace it entirely. This process happens multiple times throughout their life cycle.
Many new USA pet owners confuse Jumping spider molting or dead situations because the spider becomes inactive and hangs upside down. However, this is usually normal molting behavior and not a health emergency.
Why Molting Is Essential for Growth
Jumping spiders molt to:
- Increasebody size
- Develop stronger legs
- Improve coloration
- Reach maturity
- Repair minor limb damage
Without the Jumping spider moulting process, growth would stop completely.
How often do jumping spiders molt?
If you are wondering How often do jumping spiders molt, it depends on age and species. Spiderlings molt more frequently than adults.
| Life Stage | Molting Frequency | Risk Level |
| Spiderling | Every 2 to 3 weeks | Low |
| Juvenile | Every 3 to 4 weeks | Moderate |
| Subadult | Every 4 to 6 weeks | Moderate |
| Adult | Rare or none | Low |
Understanding How often do jumping spiders molt helps reduce panic during inactive periods.
Customer Testimonial Highlight
A pet owner from Texas shared that she thought it was Jumping spider molting or dead, but after learning about the Jumping spider moulting process, she realized it was normal and her spider completed a healthy molt within days.
This knowledge builds confidence and prevents unnecessary stress for first-time USA jumping spider keepers.
Recognizing Jumping Spider Pre-Molt Behavior
Understanding Jumping spider pre-molt behavior
Before the Jumping spider moulting process begins, spiders show clear behavioral and physical changes. Recognizing Jumping spider pre-molt behavior helps prevent panic and reduces the common fear of Jumping spider molting or dead scenarios.
In the USA pet community, many new owners misinterpret inactivity as illness. In reality, pre-molt is a preparation phase where the spider conserves energy before shedding its exoskeleton.
Behavioral Signs Before Molting
During Jumping spider moulting time, you may notice:
- Refusal to eat even favorite prey
- Increased hiding behavior
- Less movement around theenclosure
- Spending more time inside a silk retreat
- Building a thicker Jumping spider molting hammock
The Jumping spider molting hammock is a protective silk structure where the spider safely completes the molt.
Physical Signs of Pre-Molt
Physical indicators include:
- Slightly dull or faded coloration
- Swollen abdomen
- Slower reaction to stimuli
- Reduced hunting response
Understanding Jumping spider pre-molt behavior prevents unnecessary enclosure disturbance.
Comparison Table: Pre-Molt vs Health Issue
| Sign | Pre-Molt | Illness |
| Appetite | Stops eating | Stops eating |
| Movement | Reduced but stable | Weak or uncoordinated |
| Webbing | Builds molting hammock | No web activity |
| Duration | 3 to 10 days | Worsens progressively |
If your spider builds a Jumping spider molting hammock, it is usually entering the Jumping spider moulting process safely.
Customer Testimonial Highlight
A Florida owner reported worrying about Jumping spider molting or dead behavior when her spider stopped eating. After observing the Jumping spider molting hammock, she realized it was normal Jumping spider moulting time and the molt completed successfully.
Recognizing Jumping spider pre-molt behavior is the first step toward stress-free spider care.
Preparing the Enclosure for Safe Jumping spider moulting time
Creating the Ideal Environment for the Jumping spider moulting process
A safe enclosure setup plays a critical role during Jumping spider moulting time. Improper humidity or temperature is one of the biggest causes behind failed molts in the USA captive spider community. If conditions are unstable, owners may mistakenly assume Jumping spider molting or dead situations.
The goal is stability, not constant adjustments.
Humidity Requirements During Jumping spider moulting time
Proper moisture supports a smooth Jumping spider moulting process by softening the old exoskeleton.
Recommended humidity range:
- 60 to 75 percent for most common USA species
- Light misting on enclosure walls, not directly on the spider
- Ensure ventilation to prevent mold growth
- Provide a small water source if appropriate
Never oversaturate the enclosure. Excess moisture can be just as dangerous as dryness.
Temperature Stability Matters
During Jumping spider moulting time, temperature should remain steady.
- Ideal range: 72 to 78°F
- Avoid placing enclosure near windows or vents
- Do not move the enclosure during molting
Sudden changes increase stress and interfere with the Jumping spider moulting process.
Comparison Table: Proper Setup vs Risky Setup
| Factor | Proper Setup | Risky Setup |
| Humidity | Stable 60 to 75 percent | Very dry or overly wet |
| Temperature | Consistent 72 to 78°F | Fluctuating daily |
| Disturbance | No handling | Frequent checking |
| Web Support | Stable surfaces | Loose decorations |
Stable conditions reduce the risk of Jumping spider molting or dead confusion.
Customer Testimonial Highlight
A California hobbyist shared that after correcting humidity levels, her spider completed the Jumping spider moulting process successfully inside its Jumping spider molting hammock without complications.
Proper preparation ensures a smooth Jumping spider moulting time and protects your spider’s health.
What Not to Do During the Jumping Spider Moulting Process
Avoiding Mistakes During Jumping spider moulting time
The biggest risk during the Jumping spider moulting process is unnecessary disturbance. Many new USA owners panic when they see inactivity and assume Jumping spider molting or dead. In reality, interference during this delicate stage can cause serious harm.
Understanding what not to do is just as important as proper setup.
Common Mistakes During Jumping spider moulting time
Avoid these actions:
- Do not handle your spider
- Do not open the Jumping spider molting hammock
- Do not offer food during pre-molt
- Do not move the enclosure
- Do not increase misting suddenly
During Jumping spider moulting time, the spider is extremely vulnerable. Even small stressors can interrupt the Jumping spider moulting process.
Why Disturbance Is Dangerous
When the spider exits its old exoskeleton, its new body is soft. Interruption can cause:
- Incomplete shedding
- Leg deformities
- Failed molts
- Increased stress response
This is when many people mistakenly think Jumping spider molting or dead, especially if the spider lies still afterward.
Pros and Cons of Minimal Intervention
| Approach | Benefits | Risks |
| Minimal interference | Higher success rate | Requires patience |
| Frequent checking | Temporary reassurance | Increased molting failure risk |
| Handling during molt | None | Severe injury risk |
The safest strategy during the Jumping spider moulting process is observation without interaction.
Customer Testimonial Highlight
A New York keeper shared that after resisting the urge to check inside the Jumping spider molting hammock, her spider completed the Jumping spider moulting time successfully and emerged fully intact.
Patience is critical. Most Jumping spider molting or dead fears are simply part of the natural Jumping spider moulting process.
Jumping Spider Molting How Long Does It Take?
Understanding Jumping spider molting how long Each Stage Lasts
One of the most searched questions in the USA is Jumping spider molting how long does it take. The answer depends on age, species, and environmental stability. The full Jumping spider moulting process includes pre-molt, active molt, and post-molt recovery.
Many owners panic during this stage and assume Jumping spider molting or dead, but timing awareness prevents unnecessary stress.
Full Jumping spider moulting time Breakdown
Here is a realistic timeline:
- Pre-molt phase: 3 to 10 days
- Active molt stage: 30 minutes to 4 hours
- Post-molt hardening: 24 to 72 hours
- Feeding recovery period: 3 to 7 days
During pre-molt, Jumping spider pre-molt behavior becomes visible. The spider stays inside the Jumping spider molting hammock and stops eating.
Timeline Comparison Table
| Stage | Duration | What You See | Risk Level |
| Pre-Molt | 3 to 10 days | Inactive, hiding | Low |
| Active Molt | 1 to 4 hours | Spider upside down | Moderate |
| Post-Molt | 1 to 3 days | Very still | Moderate |
| Recovery | Up to 7 days | Slow movement | Low |
If you watch a Jumping Spider molting time Lapse video, you will see the actual shedding looks dramatic but is completely natural.
Why Timing Awareness Matters
Knowing Jumping spider molting how long reduces the fear of Jumping spider molting or dead. The spider may remain motionless after the molt, which is part of the normal Jumping spider moulting process.
Customer Testimonial Highlight
An Arizona owner said she nearly disturbed her spider during Jumping spider moulting time because it stayed still for hours. After understanding Jumping spider molting how long typically lasts, she waited patiently and the spider recovered perfectly.
Understanding timing is key to stress-free molting management.
Post-Molt Care for Jumping Spiders
Ensuring a Smooth Recovery After the Jumping Spider Moulting Process
After the Jumping spider moulting process is complete, proper post-molt care is crucial. Many USA pet owners mistake immobility after shedding as Jumping spider molting or dead. Understanding recovery behavior ensures the spider thrives.
Immediate Post-Molt Actions
Once the spider has fully emerged from its old exoskeleton:
- Keep the enclosure undisturbed for at least 24 hours
- Avoid offering food immediately
- Ensure stable humidity and temperature remain consistent
- Observe from a distance
Jumping spiders are soft and vulnerable immediately post-molt, making this step critical.
Feeding After Molt
- Wait 24 to 72 hours depending on spider size
- Offer small prey first
- Monitor hunting behavior
- Avoid forcing feeding; patience is key
Checking for Molting Complications
Not all molts go perfectly. Look for:
- Stuck limbs or incomplete exoskeleton
- Signs of dehydration or discoloration
- Weak or floppy movements
If you notice severe issues, consult a local arachnid expert rather than interfering directly. This prevents injury and stress.
Comparison Table-Normal vs Problematic Post-Molt Signs
| Observation | Normal Recovery | Problematic |
| Activity | Slow movement | Unresponsive |
| Limbs | All intact | Stuck or missing |
| Feeding | Small prey after 1–3 days | Refusal >7 days |
| Web | Returns to usual activity | No web or abnormal behavior |
Customer Testimonial Highlight
A customer from Illinois shared that by leaving her spider undisturbed after the Jumping spider moulting process, it returned to hunting successfully within 2 days. She confirmed that monitoring carefully without touching was the key to a safe recovery.
Post-molt care ensures the spider completes the Jumping spider moulting process without stress or injury, building confidence for first-time USA pet owners.
Common Moulting Problems and How to Solve Them
Troubleshooting the Jumping Spider Moulting Process
Even with careful preparation, some USA pet owners encounter issues during the Jumping spider moulting process. Knowing common problems helps distinguish between normal behavior and emergencies. Many think their spider is Jumping spider molting or dead when complications arise.
Typical Moulting Problems
- Stuck molt– Spider cannot fully shed exoskeleton
- Failed molt– Partial shedding causing deformities
- Dehydration– Leads to brittle exoskeleton
- Missing limbs or damage– Often due to enclosure disturbance
- Excessive inactivity– Can signal pre-molt or post-molt stress
Solutions and Preventive Measures
- Maintain proper humidity and temperature
- Avoid handling during Jumping spider moulting time
- Mist lightly to support hydration
- Provide smooth surfaces for molting hammock construction
- Seek arachnid expert assistance if stuck molt persists
Comparison Table-Normal vs Dangerous Moults
| Sign | Normal Molt | Dangerous Molt |
| Limb movement | Smooth | Limp or stuck |
| Color | Slightly dull pre-molt, then vibrant | Dark, brittle, or uneven |
| Activity | Slightly reduced | No movement > 12 hours during active molt |
| Recovery | Within 1–3 days | Does not recover |
Customer Testimonial Highlight
A New Jersey owner noticed her spider’s abdomen appeared stuck during Jumping spider moulting time. She increased humidity slightly, left the spider undisturbed, and within a few hours, it completed the Jumping spider moulting process successfully.
Pros and Cons of Intervention
| Approach | Pros | Cons |
| Immediate intervention | May help stuck molt | High risk of injury |
| Minimal intervention | Spider completes molt naturally | Requires patience |
| Expert guidance | Safe correction | May be costly |
Knowing how to identify and handle problems ensures the Jumping spider moulting process remains stress-free and reduces unnecessary fears of Jumping spider molting or dead.
Stress-Free Jumping Spider Moulting Setup Checklist
How to Ensure a Safe and Calm Molt
A stress-free environment is the key to successful Jumping spider moulting time. Many USA owners panic thinking their spider is Jumping spider molting or dead, but proper setup prevents complications and ensures a smooth Jumping spider moulting process.
Essential Checklist for Safe Molting
- Maintain stable humiditybetween 60–75 percent
- Keep temperature consistentat 72–78°F
- Provide a secure Jumping spider molting hammock
- Avoid handling or disturbingthe spider
- Lightly mist walls, not the spider directly
- Observe without interference
- Prepare the enclosure well in advanceof pre-molt signs
Comparison Table – Stress-Free vs Risky Setup
| Factor | Stress-Free Setup | Risky Setup |
| Humidity | Stable 60–75% | Dry or over-misted |
| Temperature | 72–78°F constant | Fluctuating |
| Spider Handling | None | Frequent |
| Hammock | Secure & stable | Unstable surfaces |
| Observation | Quiet, indirect | Frequent disturbance |
Customer Testimonial Highlight
A Texas owner reported that after applying the stress-free checklist, her spider completed the Jumping spider moulting process naturally, without any signs of injury or stress. She emphasized that patience and correct environmental control were crucial.
Ensure your jumping spider experiences a smooth and safe molt by preparing your enclosure properly. For detailed guides on Jumping spider moulting process, habitat care, and advanced tips, visit jumpingspider.xyz today and learn how to make every molt stress-free and successful.
FAQs – Safe & Stress-Free Jumping Spider Moulting Tips
- How often do jumping spiders molt?
Jumping spiders molt at different rates depending on age and species. Spiderlings molt more frequently, often every 2–3 weeks, while adults molt rarely. Understanding How often do jumping spiders molt helps prevent confusion between natural inactivity and Jumping spider molting or dead scenarios.
- What is the Jumping spider moulting process?
The Jumping spider moulting process involves shedding the old exoskeleton to grow. During this time, the spider becomes inactive, builds a Jumping spider molting hammock, and carefully exits its old shell. Awareness of this process reduces stress for USA pet owners.
- How long does Jumping spider moulting time last?
Jumping spider moulting time varies: pre-molt lasts 3–10 days, active molting 30 minutes to 4 hours, and post-molt hardening 24–72 hours. Knowing Jumping spider molting how long ensures owners avoid unnecessary disturbance.
- What is a Jumping spider molting hammock?
A Jumping spider molting hammock is a silk structure the spider builds to safely complete the Jumping spider moulting process. It provides stability and reduces stress, allowing the spider to molt without external interference.
- How can I tell if my Jumping spider is Jumping spider molting or dead?
Look for inactivity inside the Jumping spider molting hammock, dull coloration, and reduced appetite. If the spider completes the Jumping spider moulting process within the expected timeframe, it is healthy, not dead.
- What should I expect during Jumping spider pre-molt behavior?
Jumping spider pre-molt behavior includes hiding, refusing food, reduced activity, and silk hammock building. Recognizing these signs helps owners prepare the enclosure for safe Jumping spider moulting time.
- What is Jumping Spider molting time lapse?
Jumping Spider molting time lapse videos show the complete process from pre-molt to post-molt. Observing these clips helps owners understand how the Jumping spider moulting process unfolds naturally and reduces panic about Jumping spider molting or dead concerns.