Jumping Spider Molting Explained: What Every Owner Must Know
Understanding Jumping Spider Molting is essential for every pet owner in the USA. Molting is a natural process where a spider sheds its old exoskeleton to grow.
Many beginners often panic when they see their spider motionless or hiding for long periods. However, this behavior is completely normal and usually indicates an upcoming molt.
In fact, jumping spider molting is one of the most important stages in their life cycle. Without it, they cannot grow or reach adulthood. As a result, recognizing the signs early can help prevent unnecessary stress or mistakes.
Additionally, molting can sometimes be confused with illness or death. For example, a spider may appear lifeless but is actually preparing to shed its skin. Therefore, understanding this process is critical for proper care.
In this guide, you will learn everything about:
- What molting actually means
- How often jumping spiders molt
- Clear molting signs and behavior changes
- Step-by-step molting process
- Proper care during and after molting
Moreover, this guide is based on real experience from spider keepers in the USA. It combines practical insights with expert-level knowledge to help you care for your spider confidently.
So, if your spider is acting strange, this article will help you understand exactly what is happening and what you should do next.
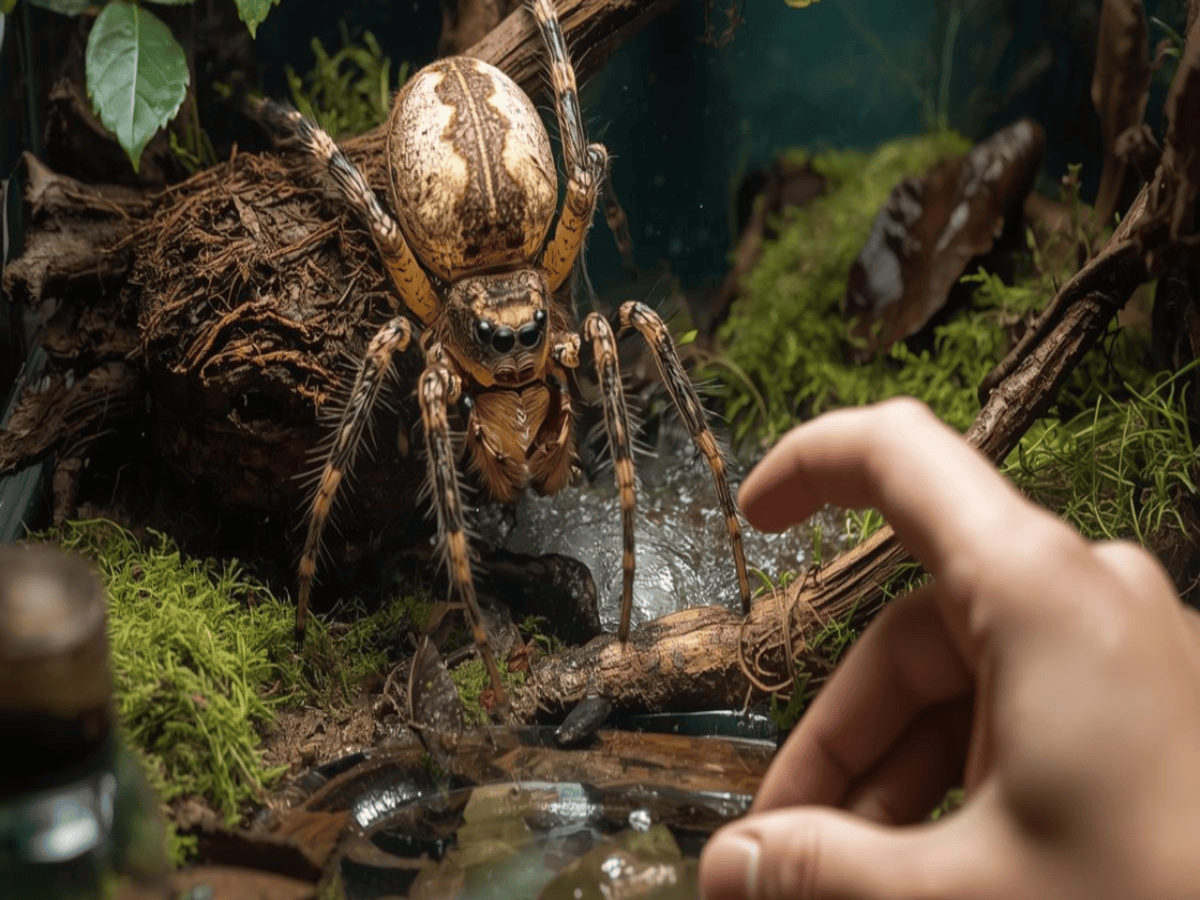
What Is Jumping Spider Molting?
Jumping Spider Molting is a natural biological process where a spider sheds its old exoskeleton and forms a new one. This process is essential for growth, repair, and development.
Unlike mammals, spiders do not grow continuously. Instead, they grow in stages. As a result, they must periodically shed their hard outer layer to increase in size.
In simple terms, molting is like “outgrowing a suit of armor.” The spider leaves its old skin behind and emerges with a fresh, larger body.
Why Molting Happens
Molting is necessary for survival. Without it, a jumping spider cannot grow or reach adulthood. Additionally, it allows the spider to repair minor damage to its body.
- Helps the spider grow in size
- Repairs damaged body parts
- Allows development from juvenile to adult
- Refreshes the exoskeleton for better mobility
How Often Do Jumping Spiders Molt?
The frequency of jumping spider molting depends on age, species, and feeding conditions. Young spiders molt more frequently than adults.
For example:
- Juvenile spiders: Every 1–3 weeks
- Sub-adults: Every few weeks to months
- Adults: Usually stop molting after maturity
However, environmental factors also play a major role. Temperature, humidity, and food availability can speed up or slow down the molting cycle.
Jumping Spider Molting Process Overview
The jumping spider molting process is complex but follows a predictable pattern. It involves preparation, shedding, and recovery phases.
First, the spider enters a pre-molt stage where it stops eating and becomes inactive. Then, it slowly separates from its old exoskeleton. Finally, it emerges with a soft new body that gradually hardens.
Additionally, this process is very delicate. Any disturbance during molting can cause serious stress or injury to the spider.
Important Insight for Pet Owners
Many USA-based spider keepers report that molting is often mistaken for death. This happens because spiders become completely still for long periods.
However, this is normal behavior. Therefore, it is important not to touch or disturb your spider during this stage.
Understanding this process helps owners provide better care and avoid unnecessary mistakes.
Jumping Spider Molting Signs You Should Never Ignore
Recognizing Jumping Spider Molting early is very important for proper care. Many owners in the USA panic when their spider suddenly changes behavior. However, these changes are usually normal pre-molt signs.
Before molting begins, a jumping spider shows clear behavioral and physical signals. Additionally, these signs help you prepare the environment and avoid disturbing the spider during this sensitive stage.
Common Behavioral Signs of Molting
Behavior changes are usually the first indicators of jumping spider molting signs. These changes may appear a few days before the actual molt.
- Loss of appetite or refusing food
- Spending more time hiding in a web or corner
- Reduced movement and slower reactions
- Less interest in hunting prey
In fact, many keepers notice that their spider becomes unusually inactive. However, this is completely normal and not a health problem.
Physical Signs Before Molting
Along with behavior changes, physical signs also appear. These are strong indicators that the molting process is near.
- Body color becomes darker or dull
- Abdomen may look slightly swollen
- Eyes may appear cloudy or less shiny
- Old skin starts looking tight or stretched
As a result, these changes signal that the spider is preparing to shed its exoskeleton.
Jumping Spider Molting How Long Before It Starts?
Many owners ask about timing. Jumping spider molting how long it takes to begin depends on the spider’s stage and environment.
Typically, pre-molt signs can last from a few days to two weeks. Juvenile spiders often molt faster, while older juveniles take longer.
Additionally, temperature and feeding patterns can affect timing. For example, well-fed spiders may enter molting sooner than underfed ones.
Expert Observation (USA Keeper Experience)
Experienced spider keepers in the USA often use behavior tracking to predict molting. They observe feeding refusal as the strongest early signal.
However, they also recommend patience. Disturbing a spider during this phase can delay or disrupt molting.
Therefore, the best approach is to observe quietly and maintain a stable environment.
Understanding these signs helps you provide safer and more effective care during jumping spider molting.
Jumping Spider Molting Process Explained Step by Step
The Jumping Spider Molting process is a carefully controlled biological cycle. It may look simple, but it involves multiple stages that must happen in order. Additionally, understanding each step helps you avoid common mistakes as a spider keeper in the USA.
During molting, the spider completely transforms its outer body. However, this process is slow, sensitive, and highly energy-demanding. As a result, even small disturbances can affect its survival.
Step 1: Pre-Molt Preparation
This is the first stage of jumping spider molting process. The spider begins to prepare internally for shedding its old exoskeleton.
- Stops eating food completely
- Becomes less active
- Spends more time hiding
- Starts building a safe resting area
Additionally, the spider may appear darker or dull in color. This is a normal signal that molting is approaching.
Step 2: Separation From Old Exoskeleton
At this stage, the spider’s body starts separating from its old outer layer. This process is internal and not easily visible.
However, the spider may appear extremely still. In fact, many owners mistakenly think it is dead during this phase.
Therefore, it is very important not to disturb the enclosure during this time.
Step 3: Shedding the Exoskeleton
This is the actual molting moment. The spider slowly pushes itself out of the old skin.
- The old exoskeleton splits open
- The spider carefully pulls out its legs and body
- The process may take several minutes to hours
Additionally, the spider’s new body appears soft, pale, and very fragile after emergence.
Step 4: Post-Molt Expansion
After exiting the old shell, the spider begins expanding its new body. This is a critical recovery stage.
During this time:
- The spider remains still for several hours
- It allows its body to fully expand
- The new exoskeleton slowly hardens
As a result, the spider gradually regains strength and mobility.
Step 5: Full Hardening and Recovery
This is the final stage of jumping spider molting. The new exoskeleton becomes firm and protective.
After this stage, the spider resumes normal behavior, including hunting and movement. However, it may take a few days to fully recover strength.
Additionally, feeding should only resume once the spider is fully hardened.
Understanding this full process helps you support your spider safely and avoid unnecessary stress during molting.
How to Care for a Jumping Spider During Molting
Proper care during Jumping Spider Molting is extremely important. This stage is very sensitive, and even small mistakes can affect the spider’s survival.
Many USA-based spider keepers report that most molting issues happen due to disturbance, incorrect humidity, or feeding at the wrong time. Therefore, careful handling is essential.
Keep the Environment Completely Stable
Stability is the most important factor during molting. Any sudden change can stress the spider.
- Maintain consistent temperature
- Avoid moving the enclosure
- Keep lighting soft and stable
- Do not shake or open the habitat frequently
Additionally, a quiet environment helps the spider focus on the molting process without stress.
Do Not Feed During Molting
One of the most common mistakes is offering food during jumping spider molting.
However, the spider completely stops eating before and during this stage. Forcing food can cause stress or injury.
Therefore:
- Do not offer insects during pre-molt
- Remove any live prey from enclosure
- Wait until post-molt recovery before feeding again
Maintain Proper Humidity Levels
Humidity plays a key role in successful molting. If the environment is too dry, the spider may struggle to shed its exoskeleton.
However, excessive moisture can also create problems. Therefore, balance is important.
- Light misting if needed
- Avoid soaking the enclosure
- Ensure ventilation is proper
Additionally, many experienced keepers in the USA use indirect humidity methods rather than direct spraying.
Do Not Touch or Disturb the Spider
During molting, the spider is extremely vulnerable. Even slight disturbance can interrupt the process.
For example, opening the enclosure or tapping the container can cause stress responses.
As a result, it is best to observe from a distance only.
Provide Safe Hiding Spaces
Jumping spiders prefer secure areas during molting. A good hiding spot reduces stress and improves success rates.
- Small cork bark hides
- Leafy corners or silk hammocks
- Vertical climbing surfaces
These elements help the spider feel secure while undergoing jumping spider molting.
In conclusion, a stable, quiet, and stress-free environment significantly increases successful molting outcomes.
Common Problems During Jumping Spider Molting
Even though Jumping Spider Molting is a natural process, problems can still occur. In some cases, environmental stress or improper care may lead to complications.
Understanding these issues helps you respond correctly and improve survival chances. Additionally, many USA-based keepers report that most molting problems are preventable with proper setup and patience.
1. Stuck Molt (Failed Shedding)
One of the most serious issues is a stuck molt. This happens when the spider cannot fully remove its old exoskeleton.
- Old skin remains attached to legs or body
- Spider struggles to move properly
- Molting process stops midway
However, this is often caused by low humidity or stress during jumping spider molting process.
Therefore, maintaining proper humidity and avoiding disturbance is critical for prevention.
2. Dehydration Problems
Dehydration is another common risk. Spiders need moisture to successfully complete molting.
- Dry environment slows down molting
- Exoskeleton becomes hard to shed
- Spider may become weak
Additionally, incorrect enclosure conditions in dry climates (common in parts of the USA) can increase this risk.
3. Premature Disturbance
Many molting failures happen because of human interference. Even small disturbances can interrupt the process.
For example:
- Opening enclosure frequently
- Touching or moving the habitat
- Introducing live prey too early
As a result, the spider may stop molting or become stressed.
4. Molting Death (Rare but Possible)
Although rare, molting death can occur. This usually happens when multiple stress factors combine.
- Extreme dehydration
- Severe stuck molt
- Weak or unhealthy spider before molting
However, in most cases, proper care significantly reduces this risk during jumping spider molting.
5. Weak Post-Molt Recovery
After molting, spiders are extremely fragile. If disturbed too early, recovery may fail.
Common signs of weak recovery include:
- Slow movement after hardening
- Delayed feeding response
- Soft or incomplete exoskeleton hardening
Therefore, patience is essential. The spider needs time to fully recover before handling or feeding.
Expert Insight
Experienced spider keepers in the USA emphasize one key rule: do not intervene during molting unless absolutely necessary.
In fact, most issues occur due to human interference rather than natural failure. Therefore, observation is always better than action.
Understanding these common problems helps you provide safer and more reliable care for your spider.
After Molting Care for Jumping Spiders
Proper aftercare following Jumping Spider Molting is just as important as the molting process itself. Once the spider sheds its old exoskeleton, it enters a fragile recovery phase.
During this time, the spider’s new body is soft and delicate. As a result, even minor disturbances can cause harm. Therefore, careful observation is essential for safe recovery.
What Happens Immediately After Molting?
Right after molting, the spider behaves very differently compared to its normal state.
- Body appears soft and pale
- Spider remains mostly still
- Legs may look stretched or weak
- Movement is slow and cautious
Additionally, the exoskeleton takes time to fully harden. This is a natural part of jumping spider molting process.
How Long Does Recovery Take?
Many owners ask: jumping spider molting how long does recovery take?
Typically, recovery depends on size and species. However, general timelines are:
- Small spiders: 24–48 hours
- Medium spiders: 2–3 days
- Larger juveniles: up to 5 days
During this time, the spider gradually regains strength and mobility.
When to Feed After Molting
Feeding too early is one of the most common mistakes. Even though the spider may look normal, its body is still soft internally.
Therefore:
- Wait until the exoskeleton is fully hardened
- Check that movement is normal and stable
- Start with small, soft prey first
In fact, most USA-based keepers recommend waiting at least 2–3 days before feeding adult juveniles.
Behavior Changes After Molting
After jumping spider molting, noticeable behavioral changes often occur.
- Increased activity levels
- Improved vision and hunting behavior
- Temporary confusion or slow reactions
- Exploration of enclosure
Additionally, spiders may appear slightly larger and more vibrant after each molt.
Common Mistakes to Avoid
Many beginners accidentally harm their spiders during recovery. Avoid these common errors:
- Handling the spider too early
- Offering large or hard prey immediately
- Changing enclosure setup during recovery
- Assuming inactivity means illness
However, patience ensures a smooth recovery and long-term health.
Expert Insight
Experienced spider keepers in the USA emphasize one key principle: “leave the spider alone after molting.”
In most cases, the spider will recover naturally without intervention. Therefore, minimal disturbance is the best approach.
Understanding after-molt behavior helps ensure a safe transition back to normal feeding and activity.
Expert Tips for Successful Jumping Spider Molting
Successful Jumping Spider Molting depends on correct care, stable conditions, and patience. Experienced spider keepers in the USA follow specific practices that significantly improve molting success rates.
Additionally, understanding what works and what doesn’t helps beginners avoid common mistakes. Therefore, this section combines expert insights, comparisons, and practical care strategies.
Expert Care Tips for Better Molting Success
These proven tips are widely used by experienced keepers:
- Maintain stable temperature and humidity at all times
- Do not disturb the enclosure during pre-molt stage
- Remove all live prey before molting begins
- Provide vertical hiding spaces for safety
- Observe from a distance only
In fact, consistency is more important than complex setup changes during jumping spider molting.
Comparison: Healthy vs Poor Molting Conditions
| Factor | Healthy Conditions | Poor Conditions |
|---|---|---|
| Humidity | Balanced and stable | Too dry or too wet |
| Disturbance | Minimal or none | Frequent handling |
| Feeding | Stopped before molting | Live prey inside enclosure |
| Environment | Quiet and secure | Noisy or unstable setup |
Pros and Cons of Jumping Spider Molting Process
Although molting is natural, it has both advantages and challenges.
Pros
- Allows healthy growth and development
- Repairs minor body damage naturally
- Improves strength and mobility after completion
Cons
- High vulnerability during the process
- Risk of stress-related complications
- Requires strict environmental control
However, with proper care, most spiders complete molting successfully without issues.
Customer Experience Highlights (USA Keepers)
Many USA-based spider owners report positive outcomes when following proper molting care guidelines.
- “My spider molted successfully after I stopped feeding early.”
- “Humidity control made a big difference in survival.”
- “I almost mistook molting for death, but patience helped.”
Additionally, most beginners improve their success rate after understanding the molting cycle properly.
If you are caring for a jumping spider, understanding Jumping Spider Molting is essential for long-term success. Proper knowledge helps prevent mistakes and ensures a healthy, active spider.
Therefore, always observe carefully, maintain stable conditions, and avoid unnecessary interference during molting.
For more expert guides on spider care, feeding, and behavior, continue exploring our detailed resources on JumpingSpider.xyz.
Conclusion: Understanding Jumping Spider Molting
Jumping Spider Molting is one of the most important natural processes in a spider’s life cycle. It allows them to grow, repair their body, and transition through different life stages.
For pet owners in the USA, understanding this process is essential. At first, molting may look alarming because the spider becomes inactive or hides for long periods. However, this is completely normal behavior.
Additionally, recognizing the signs early helps prevent unnecessary mistakes. For example, many owners mistakenly assume their spider is sick or dead during pre-molt or molting stages.
However, with proper care, stable conditions, and patience, most spiders complete molting safely and successfully. Therefore, avoiding disturbance and maintaining the right environment is the key to healthy development.
In conclusion, learning about jumping spider molting not only improves your care skills but also ensures your spider lives a healthier and longer life.
Frequently Asked Questions (FAQs)
1. What is jumping spider molting?
Jumping spider molting is the process where a spider sheds its old exoskeleton to grow a new one. It is essential for growth and development.
2. How long does jumping spider molting take?
The molting process can take a few hours, but the full cycle including recovery may last 1 to 5 days depending on the spider’s size and age.
3. What are jumping spider molting signs?
Common signs include loss of appetite, hiding more often, dull body color, and reduced movement. These indicate the spider is preparing to molt.
4. How often do jumping spiders molt?
Juvenile spiders molt frequently, usually every 1 to 3 weeks, while adults stop molting after reaching maturity.
5. Should I feed my spider during molting?
No, you should not feed your spider during molting. They stop eating before the process begins and resume feeding only after recovery.
6. Can jumping spiders die during molting?
Yes, but it is rare. Most problems occur due to low humidity, stress, or disturbance during the molting process.
7. How do I help my jumping spider during molting?
The best way to help is by keeping the environment stable, avoiding disturbance, maintaining proper humidity, and allowing the spider to molt naturally without interference.